Friday, December 28, 2012

Eat Clean On a Budget

I'm on a healthy food kick. No, not because January 1 is right around the corner, I don't buy into resolutions :) My body and mind feel so much better after a clean diet vs. take out and sodium filled garbage. Sure I like sodium filled garbage sometimes but my body can't handle it all the time and neither can my concentration! Have you noticed how much less concentrated you are compared to eating a clean diet? Pooy I know I have and I hate that lazy feeling.

 Yesterday I went to Aldi, btw they have the cheapest and super fresh produce, and stocked up on all the essentials: lettuce, grapes, veggies, turkey burger etc... It's funny how people complain about healthy food, specifically produce, being so expensive. But, I bought lots of good, healthy produce for only $25! I compared the same products I got from Aldi to Cub Foods and You wouldn't believe how much money I saved! Check it out. Grocery shopping at Aldi is completely worth it and this is living proof.

Aldi
2 containers of grape tomatoes 1.58
Cauliflower 1.19
Artisan Lettuce 1.99
Iceberg Lettuce 0.99
1 Avacado 0.39
Mild Cheddar Cheese 1.49
Mini Sweet Peppers 2.29
Green Beans 1.39
Baby Carrots 0.5
Fresh Ground Turkey Burger 3.49
Cutie Oranges 1.99
Pretzel Sticks 1.29
2 Lemons 0.7
Fresh Garlic 0.89
Red Grapes (4 lbs) 3.99
Total $25.64

DIY Fabric Flowers


This past Fall I was a vendor in a Craft Sale. One of my biggest sellers was headbands, especially ones with these fabric flowers. I got so many compliments and questions about how I made them so I thought I would add a short tutorial. Don't worry even if you aren't a sewer, you will be able to make these. I had no idea how to sew and taught myself how to make these flowers believe me when I say, "If I can do it then you can do it!" Happy crafting friends! 

Materials needed: 
Small pieces of fabric
needle/thread
hot glue gun
buttons/jewels/embelleshments

Step 1 : Cut 5 round circles, about the same size, 

Step 2: Fold in half 


Step 3: Fold in half again

Step 4: Start sewing the circular part, it will cinch (which is what you want) Don't worry about the circular side being perfectly cut or sewn, once you add an embellishment in the middle you won't see any flaws. 

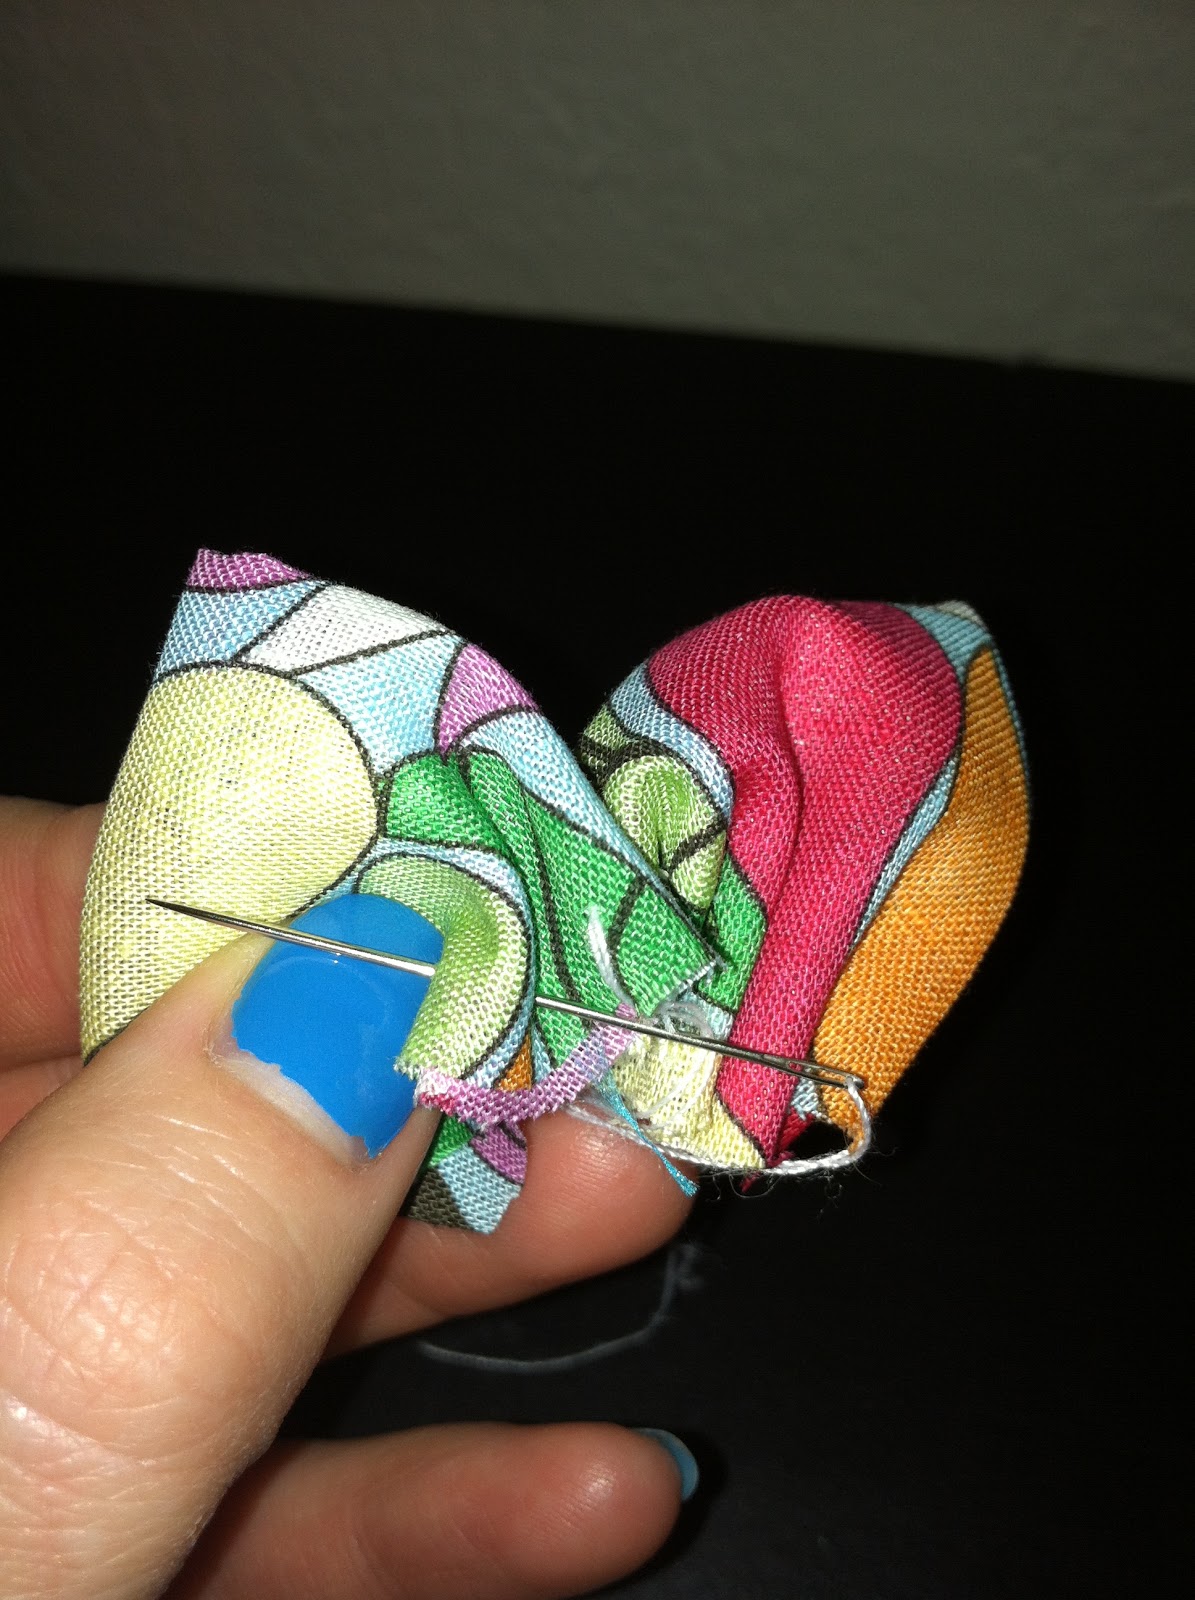
Step 5: Once you have sewn the whole side it should look something like this. You want to cinch it in order to look like a flower petal. Start sewing on the second petal the same way as the first. 

 Step 6: Sew back and forth till you get the petals to connect and cinch together


Step 7: Keep adding petals until you complete the flower. 

Step 8: Use your hot glue gun and add a button or jewel in the middle! I attached my flower to a headband


Monday, December 24, 2012

Easy, Cheap Storage Idea

As I have said before I live in a tiny one bedroom apartment, with my boyfriend Joe. We have very limited space, especially when it comes to storage. Because we live in MN, which is my excuse for having an over abundance of winter accessories: hats, mittens, scarves etc., I have winter accessories all over my apartment. You can imagine how much Joe loves that. Rather than giving my things away I found a way to keep them and keep them out of sight!

I almost forget myself that I'm still a college student and am always on a tight budget. I literally don't have the money, nor would I want to, go buy everything (where is the fun in that?) I found myself wondering around Hobby Lobby (shocker) when I found these baskets, another obsession of mine we will get into another day, and just had to have them. I decided on using them for my winter accessory storage but still didn't exactly have in mind what I would do. I wanted to get cute hooks to hang them on but I don't have a screw gun so that was out of the cards. Instead I bought 5lb 3M hooks in a silver finish. I have a small section of a wall right next to the front door that was the perfect fit for these baskets. I was a little skeptical about the 3M hooks holding up but they have done the job. It is now about 2 months later and they are still hanging just as perfect as the day I put them there. This really is a nice storage solution if you don't have much space and it's nice to look at.

What You'll Need
3M Hooks (5lbs, bought them at Home Depot)
Baskets (in sizes of your choice, make sure they have some sort of handle for hanging)


How to: 
Step 1: Find a wall to hang 
Step 2: Follow the directions of applying the 3M Hooks. Tip: actually wait the amount the directions say to before hanging your baskets. It would be a shame if they ripped or ruined your wall!
Step 4: Hang baskets! Yes, it's that easy. I choose to buy 2 different size baskets but you could get the same size or even 3 different sizes, if you have the wall space. I put hats/mittens in the top basket and scarves in the other. 

Friday, December 21, 2012

DIY Sugar Scrub | Tutorial

Hi Friends! I'm sorry I have been MIA for awhile but now I'm back for good :) Enjoy my sugar scrub tutorial
Tis the season for dry, flaky skin. After browsing through body scrubs at beauty stores such as Ulta and Sephora I realized I'm not willing to pay that much for a simple scrub! I went home and whipped up my own scrub. I had all the ingredients on hand and it smells just like the scrubs at Ulta, but it was way cheaper! This would make a great gift for you last minute Christmas shoppers or it's nice to just have on hand during the cold winter months. To make follow below!
Ingredients:
White Sugar
Brown Sugar
Almond Extract (Vanilla would also work I just like the smell of Almond better, use what you have)
Canola Oil (I was out of Olive Oil but found any will work, also use what you have)


2012-12-21 15.08.23

2012-12-21 15.08.28
2012-12-21 15.09.21

How to: 
Step 1: Add equal parts of White and Brown sugar and fill about 3/4 full. I used a small mason jar, but it depends on the amount of scrub you would like! I'm thinking if I love it I will make a huge one to last me all year! This would also be great as a Mother's Day gift or for someone you know that gardens or uses their hands a lot. I wonder what it would smell like with essential oils instead of Almond extract? Hmmm....sounds like I need to try that! I'll let you know how that goes.
2012-12-21 15.09.55
Step 2: Once you have added the sugars mix them until they make this mixture.
2012-12-21 15.10.14

Step 3: Fill the jar with Conola Oil (or whatever oil you are using) till the first line. Now, add more sugar until it fills the jar. I found mixing it this way makes it the perfect mixture of wet and dry sugar. Lastly, add a small amount of Almond Extract. I made the mistake of adding way to much and it smelt to strong! But, to each their own :) It's really your preference. Now add a cute ribbon and that's it!
2012-12-21 15.22.34