Showing posts with label DIY. Show all posts

Monday, January 14, 2013

Chic, Cheap DIY Storage

I live in a one bedroom apartment and am always looking for storage ideas. There is never enough storage and I'm finding myself coming up with smart storage solutions. I'm still a college student so you know I don't have a budget, let alone much extra money! (haha, seriously) I came up with this crazy great idea of wrapping an empty can with rope! Who would have thought how chic it looks. I plan on saving all of my cans, coffee tins and anything that could work covered in rope!

I put my make-up brushes in this one but I want to create more and fill with craft supplies, bathroom "stuff" such as cotton balls, nail polishes, or any other bathroom junk. These are really easy to make, (this one took me 10-15 minutes to make) and it turned out really cute! Next time I would try to apply the rope peices closer together so there isn't so much silver space showing in between. But other than that this DIY project is really easy, cheap and cute. There is always room for storage and this is a quick, easy fix for those small things that need a place or even as decoration. They are cute on their own, especially if there was an arrangement of different sizes. 
Supplies Needed
Empty can 
(coffee can, soup can etc..)
Hot Glue Gun
Rope 
(available at any craft store this was only $4.00 and will cover lots of cans)
How To
Step 1: Clean out your can and rip off label
Step 2: Scrap off excess adhesive. Make sure dry before starting glue process
Step 3: Start applying hot glue starting at top of can (sorry I don't have step by step pictures, I got to excited!)
Step 4: Keep applying glue, while adding rope. Work your way down the can. Make sure to apply enough glue and apply rope tightly together.
Step 5: Finish off rope at the bottom. 
Step 6: To add a nice finish, I added a layer of the top of the can so it covered the ends of the rope and added a nice looking touch (if that makes sense)


Tuesday, January 1, 2013

DIY Glitter Jar

There is never enough glitter, glam or glitz in my life. I figured since it's New Years Day I had to celebrate with some glitter. What's not to love about starting a fresh new year? It's a new start to a new you and so why not include a DIY glitter project to kick it off? I don't know what's better.

This glitter jar is super easy to make and adds a little happiness to the home. Add make up brushes, paint brushes  flowers, pens or even use it as a candle votive. There is some room for creativity with glitter colors, how much glitter you would like to use and what type of glitter to use. I had jems, sequins and glitter stickers but I decided to keep it simple with just gold glitter. Follow my tutorial to create your own glitter happiness in a jar.
Supplies Needed: 
Jar 
(use whatever empty jar you have. I used a pickle jar but you could use a mason jar, spaghetti jar or whatever you have depending on the size you would like)
Glitter 
(I happened to have thick glitter but you could use thin glitter for a more "clean" look)
Modge Podge
Paintbrush
How To:
Step 1: Take whatever jar you are have, clean and scrape off label. I used warm soapy water and a dish scrubby and the label tore right off) You can see my jar had an expiration date printed on it. A little acetone wipes that right off.
Step 2: Let your jar dry before applying Modge Podge.
Step 3: Make sure you have paper toweling underneath your work space otherwise you will have glitter all over! Start applying Modge Podge! I ended up applying the Modge Podge in sections, to make sure it didn't dry before I applied the glitter
Step 4: I found it best to apply a thin layer of glitter first, and then do another layer over the top of the first one. Applying a second layer of Modge Podge added a nicer looking texture and more of a "glitzy" look
Wallah! 

Friday, December 28, 2012

DIY Fabric Flowers


This past Fall I was a vendor in a Craft Sale. One of my biggest sellers was headbands, especially ones with these fabric flowers. I got so many compliments and questions about how I made them so I thought I would add a short tutorial. Don't worry even if you aren't a sewer, you will be able to make these. I had no idea how to sew and taught myself how to make these flowers believe me when I say, "If I can do it then you can do it!" Happy crafting friends! 

Materials needed: 
Small pieces of fabric
needle/thread
hot glue gun
buttons/jewels/embelleshments

Step 1 : Cut 5 round circles, about the same size, 

Step 2: Fold in half 


Step 3: Fold in half again

Step 4: Start sewing the circular part, it will cinch (which is what you want) Don't worry about the circular side being perfectly cut or sewn, once you add an embellishment in the middle you won't see any flaws. 

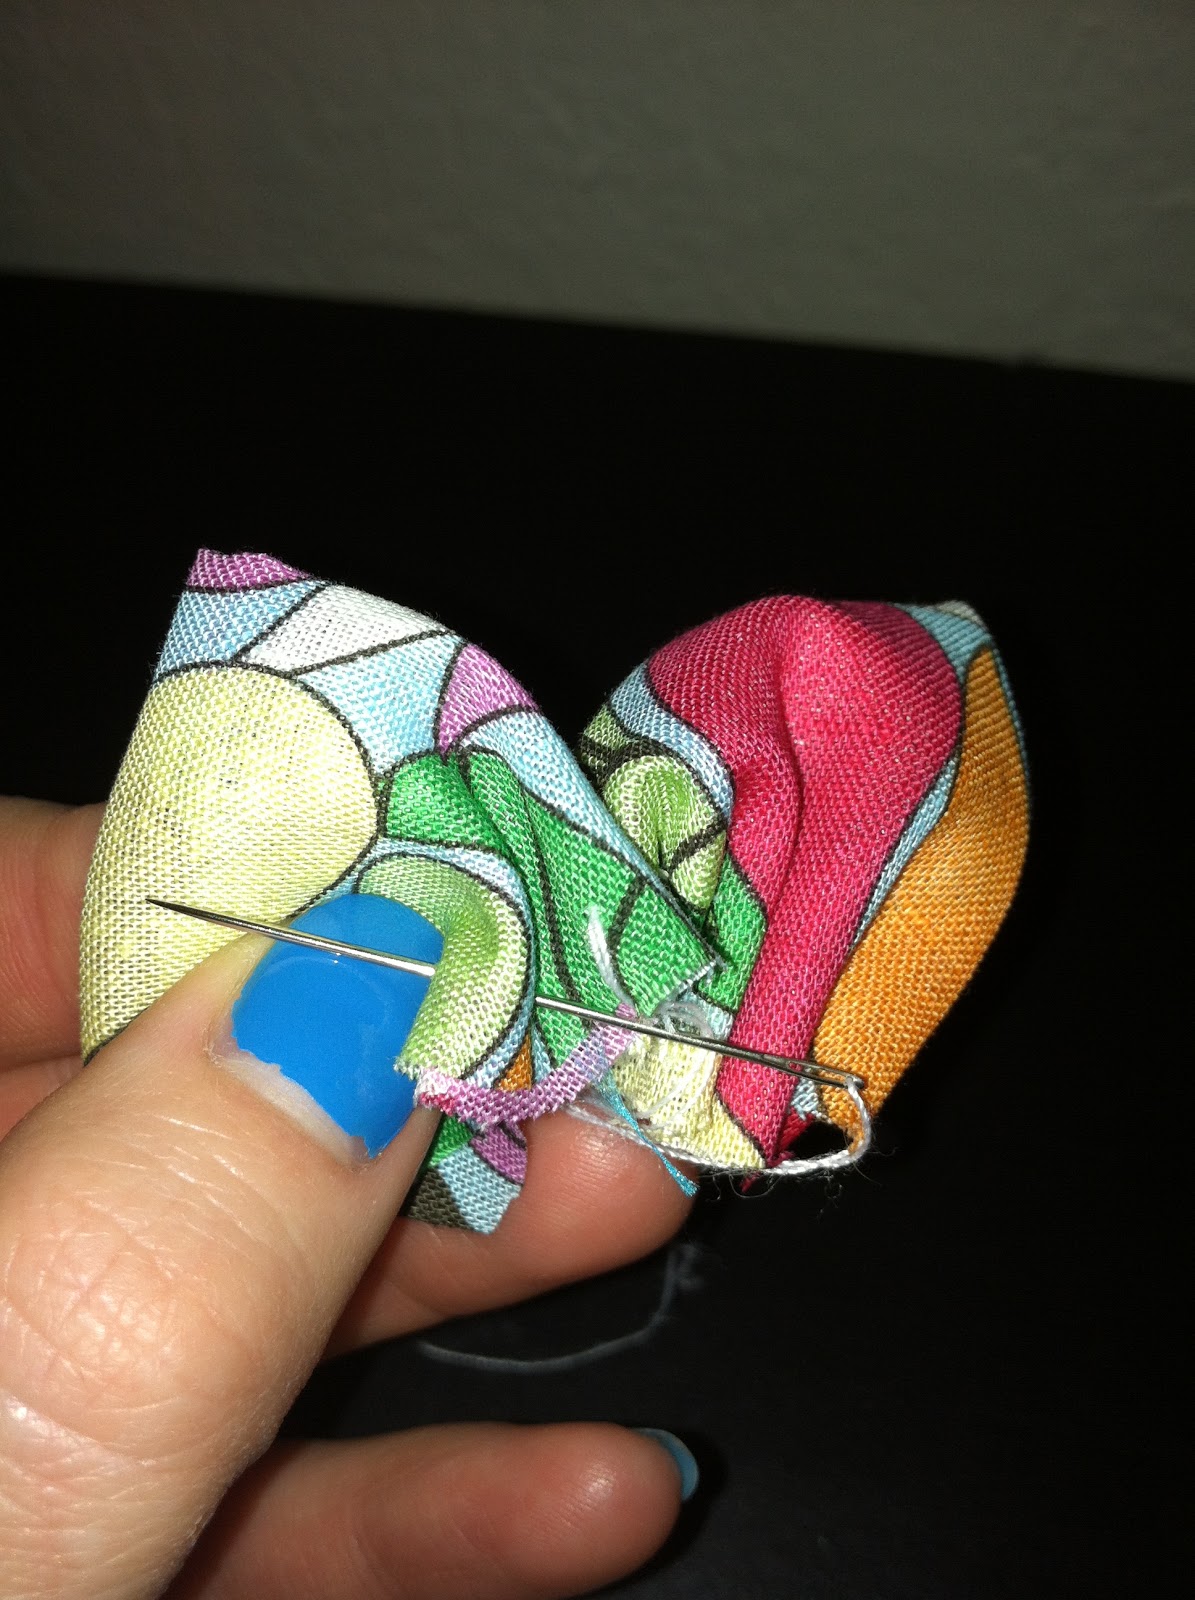
Step 5: Once you have sewn the whole side it should look something like this. You want to cinch it in order to look like a flower petal. Start sewing on the second petal the same way as the first. 

 Step 6: Sew back and forth till you get the petals to connect and cinch together


Step 7: Keep adding petals until you complete the flower. 

Step 8: Use your hot glue gun and add a button or jewel in the middle! I attached my flower to a headband


Monday, December 24, 2012

Easy, Cheap Storage Idea

As I have said before I live in a tiny one bedroom apartment, with my boyfriend Joe. We have very limited space, especially when it comes to storage. Because we live in MN, which is my excuse for having an over abundance of winter accessories: hats, mittens, scarves etc., I have winter accessories all over my apartment. You can imagine how much Joe loves that. Rather than giving my things away I found a way to keep them and keep them out of sight!

I almost forget myself that I'm still a college student and am always on a tight budget. I literally don't have the money, nor would I want to, go buy everything (where is the fun in that?) I found myself wondering around Hobby Lobby (shocker) when I found these baskets, another obsession of mine we will get into another day, and just had to have them. I decided on using them for my winter accessory storage but still didn't exactly have in mind what I would do. I wanted to get cute hooks to hang them on but I don't have a screw gun so that was out of the cards. Instead I bought 5lb 3M hooks in a silver finish. I have a small section of a wall right next to the front door that was the perfect fit for these baskets. I was a little skeptical about the 3M hooks holding up but they have done the job. It is now about 2 months later and they are still hanging just as perfect as the day I put them there. This really is a nice storage solution if you don't have much space and it's nice to look at.

What You'll Need
3M Hooks (5lbs, bought them at Home Depot)
Baskets (in sizes of your choice, make sure they have some sort of handle for hanging)


How to: 
Step 1: Find a wall to hang 
Step 2: Follow the directions of applying the 3M Hooks. Tip: actually wait the amount the directions say to before hanging your baskets. It would be a shame if they ripped or ruined your wall!
Step 4: Hang baskets! Yes, it's that easy. I choose to buy 2 different size baskets but you could get the same size or even 3 different sizes, if you have the wall space. I put hats/mittens in the top basket and scarves in the other. 

Friday, December 21, 2012

DIY Sugar Scrub | Tutorial

Hi Friends! I'm sorry I have been MIA for awhile but now I'm back for good :) Enjoy my sugar scrub tutorial
Tis the season for dry, flaky skin. After browsing through body scrubs at beauty stores such as Ulta and Sephora I realized I'm not willing to pay that much for a simple scrub! I went home and whipped up my own scrub. I had all the ingredients on hand and it smells just like the scrubs at Ulta, but it was way cheaper! This would make a great gift for you last minute Christmas shoppers or it's nice to just have on hand during the cold winter months. To make follow below!
Ingredients:
White Sugar
Brown Sugar
Almond Extract (Vanilla would also work I just like the smell of Almond better, use what you have)
Canola Oil (I was out of Olive Oil but found any will work, also use what you have)


2012-12-21 15.08.23

2012-12-21 15.08.28
2012-12-21 15.09.21

How to: 
Step 1: Add equal parts of White and Brown sugar and fill about 3/4 full. I used a small mason jar, but it depends on the amount of scrub you would like! I'm thinking if I love it I will make a huge one to last me all year! This would also be great as a Mother's Day gift or for someone you know that gardens or uses their hands a lot. I wonder what it would smell like with essential oils instead of Almond extract? Hmmm....sounds like I need to try that! I'll let you know how that goes.
2012-12-21 15.09.55
Step 2: Once you have added the sugars mix them until they make this mixture.
2012-12-21 15.10.14

Step 3: Fill the jar with Conola Oil (or whatever oil you are using) till the first line. Now, add more sugar until it fills the jar. I found mixing it this way makes it the perfect mixture of wet and dry sugar. Lastly, add a small amount of Almond Extract. I made the mistake of adding way to much and it smelt to strong! But, to each their own :) It's really your preference. Now add a cute ribbon and that's it!
2012-12-21 15.22.34

Wednesday, November 21, 2012

Homemade Dog Treats

Its safe to say I am completely obsessed with my little cocker spaniel, Teddy. I rescued him back in April and my life has revolved around him ever since. He is nothing but sweet, smiley and such a lover! However, since he is so attached, to me specifically, he has some major separation issues. My carpet is full of pee stains (YUCK) and I come home occasionally to poop also. I am trying to train but I'm finding out he needs more than just a dog bone and a thunder-shirt  I think I may need to get him on anxiety pills, which is exactly what I didn't want to do. But, what's a girl to do? I would rather he be on no medications and go the natural way but I also want to help fulfill his anxiety. Have any of you been through this before? My vet suggests the pills and says they aren't terrible for him but that he will probably be on them forever.

Well theres my .02 what I'm really here to talk about is the home-ade dog treats I make for my little pooch. Like I said, I would rather he eat natural foods and only treats that I make. If you actually read the labels it's quite disgusting what is in dog treats. I discovered this recipe and have only given him these ever since.

Teddy is probably the pickiest dog I have ever met but he chows these down in an instant. And I love it because I know what is in them, they are easy to make and they are "good" for him.

Ingredients:
2 1/2 cups whole wheat flour
1/2 cup oatmeal
1 finely chopped apple
1 beaten egg
1/3 cup veggie oil
1 tablespoon brown sugar
1/2 cup cold water
a dash of cinnamon
Preheat oven to 350 degrees and grease cookie sheets

First, blend flour, oatmeal in a large mixing bowl. Stir in apple, beaten egg, oil, sugar and water until well blended (sometimes I add a little more water if the mixture is too dry). Flour your workspace and spread dough out. Take a cookie cutter (I have a dog bone, heart, gingerbread man and snowflake) or you could roll dough into balls (just like cookies) put them on a cookie sheet and flatten them with the bottom of a cup.

Bake for 30-35 min or until crisp. Let cool and treat your pup!


Monday, November 19, 2012

Christmas Bulbs DIY

While shopping in Hobby Lobby I couldn't help but keep walking past the clear Christmas bulbs. I was literally brainstorming ideas about what I could do with those and how I could make them unique. I was frantically pacing around for about two hours chicking out Pinterest and then it hit me...

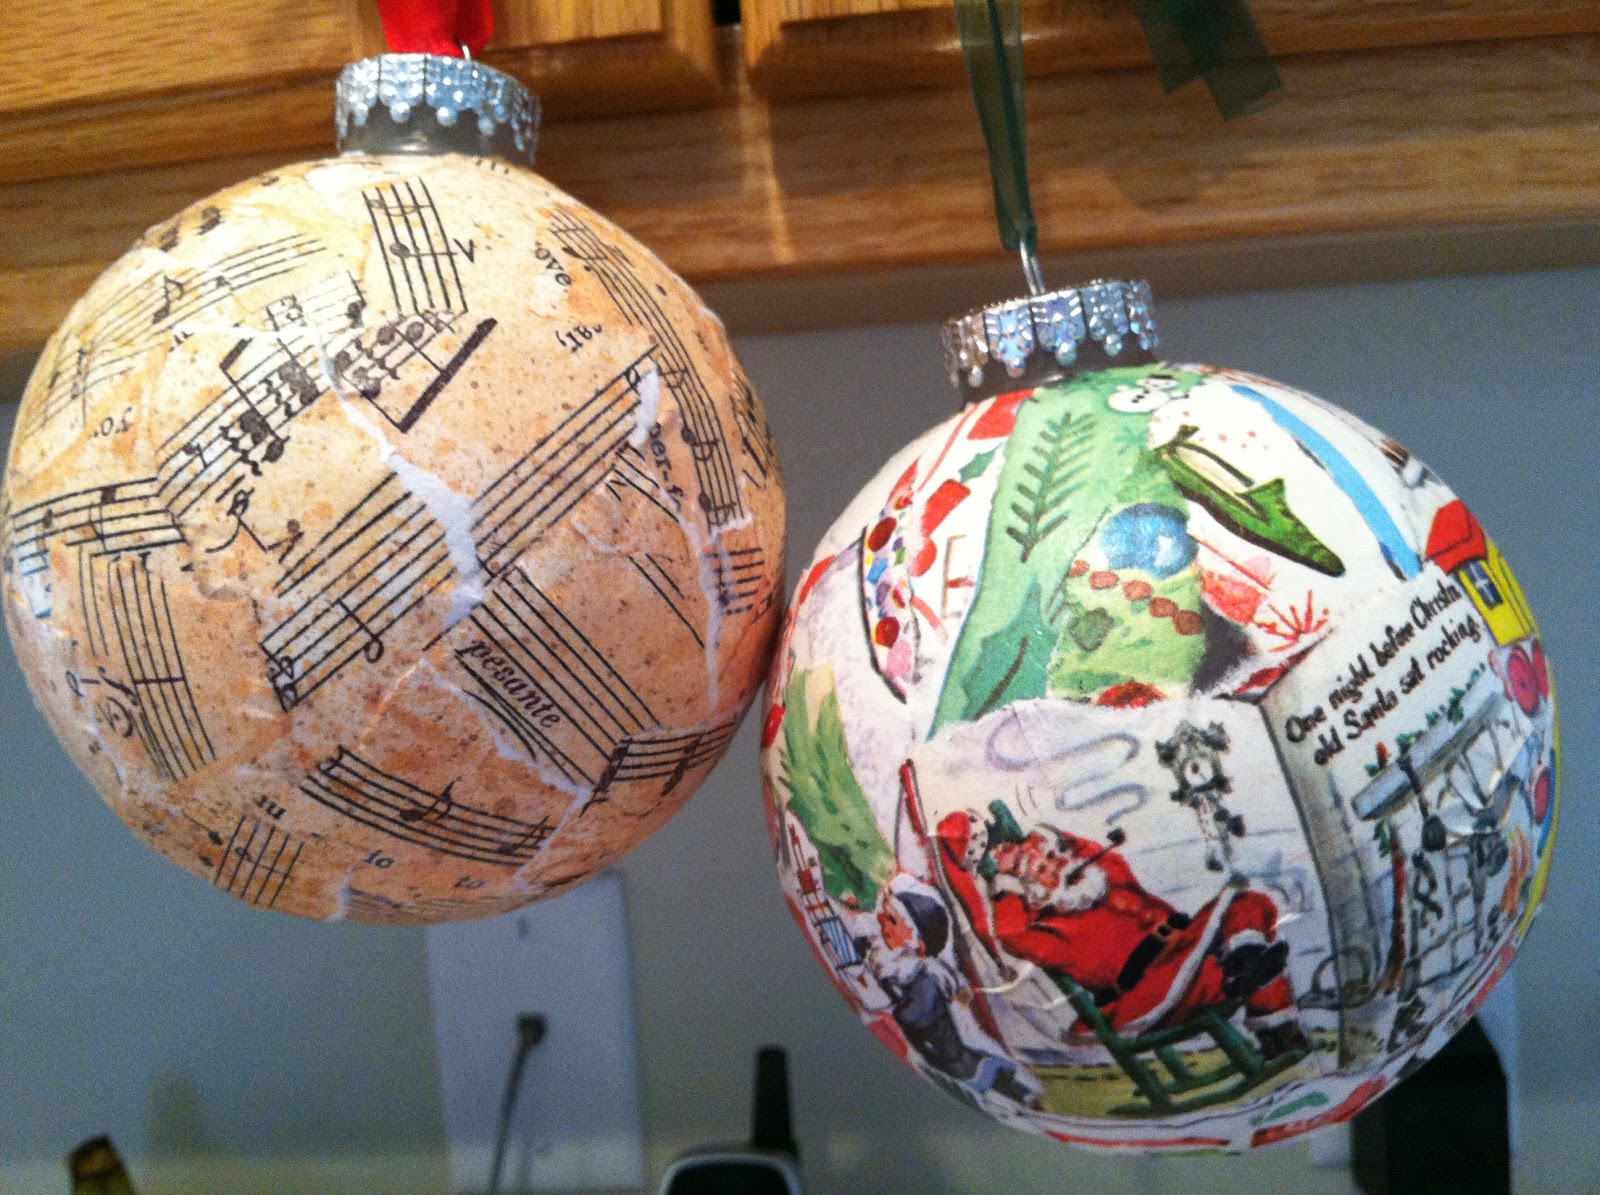
I have these old (really old) Little Golden Books at home and I thought hmmm. I could rip pieces of those up add some Modge Podge and wallah handmade, unique Christmas ornaments. Right? Well to my luck my big idea actually worked out as planned in my head (which never usually turns out how I imagine)

Supplies:
Old Christmas books, or scrapbook paper of your choice
Bulbs/ornaments of your choice (I love the big bulbs best and they are easier to work with)
Modge Podge
ribbon
peanut butter cap (to set your bulb on while creating)
glitter (if desired)


Step 1: Rip up paper. Try to do this freely it looks better when you don't try to get specific images

Step 2: Paint Modge Podge on back of paper. I discovered it works better to get it very "doused" (is that a word) that way it sticks better

Step 3: Place/smooth into position. If your peices are too big they look wrinkly or can even rip. Make sure they aren't too big so this doesn't happen to you because man oh man it's frustrating

Step 4: Add another layer of Modge Podge over top to give extra coverage. I like to add more Modge Podge than necessary. I think it looks nice (gives a nice finish) and just meshes the pieces together better. 

Step 5: Attach a pretty ribbon and hang to let dry!